Personalize your chat box to match your brand
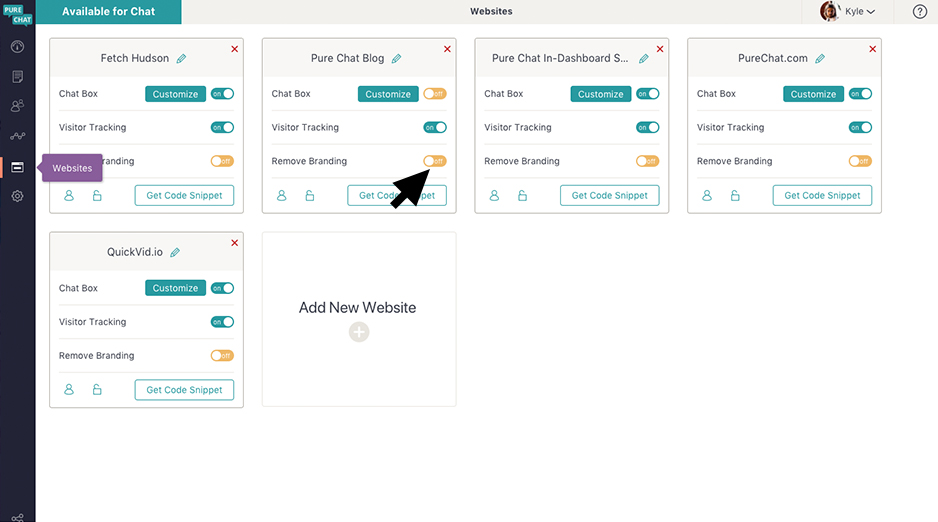
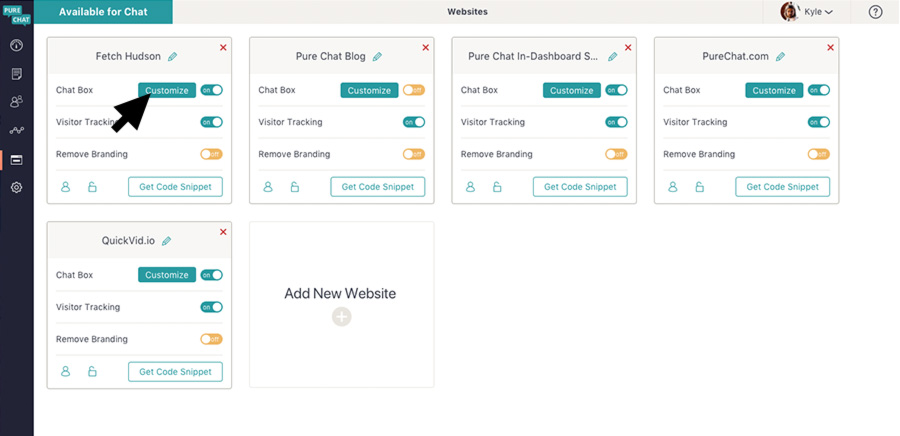
Click on the Websites icon in the left primary navigation. Once you have selected Websites on the left sidebar, pick the website chat box you’d like to customize then click on the button Customize.
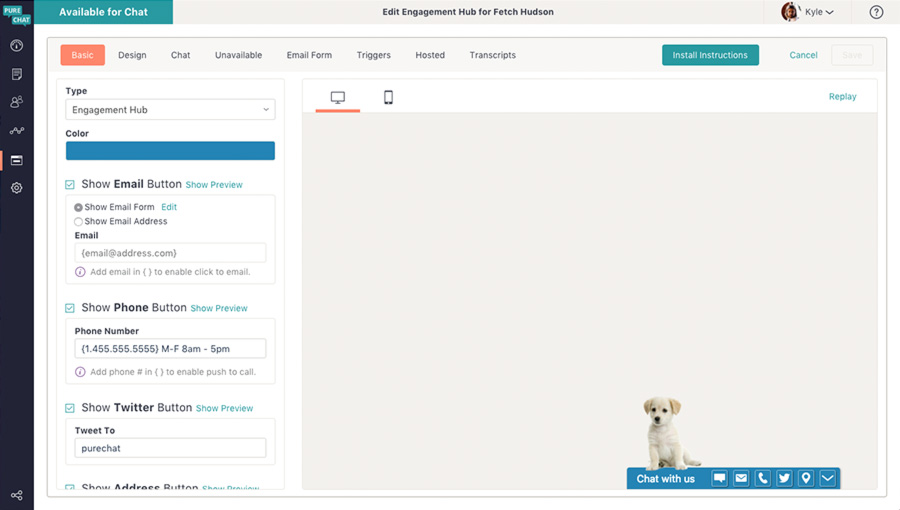
Great! Now you can customize the type, color, and contact information for your Engagment Hub. Don’t forget to save when you’re finished!
Customization Options
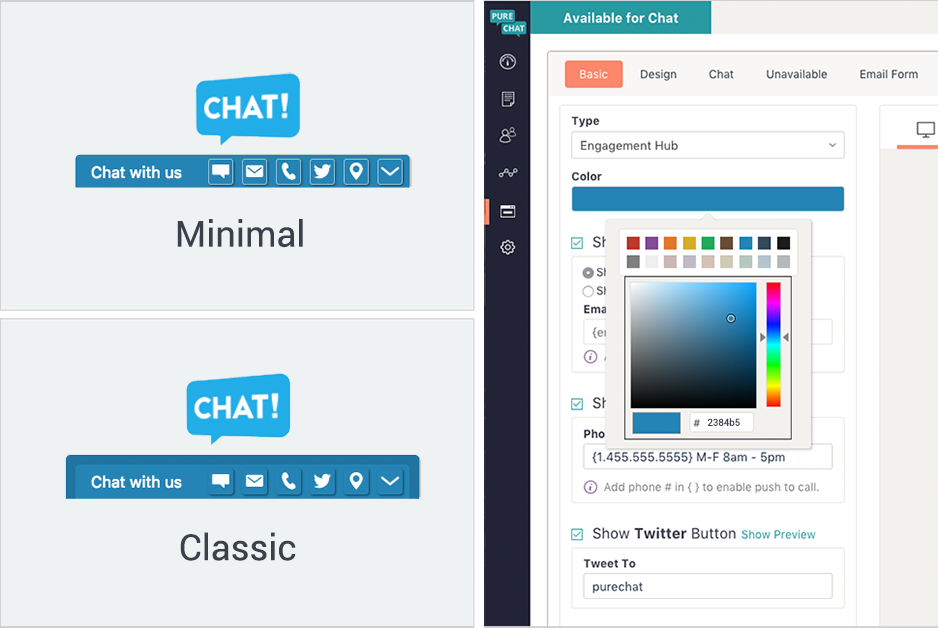
Update the Color & Type
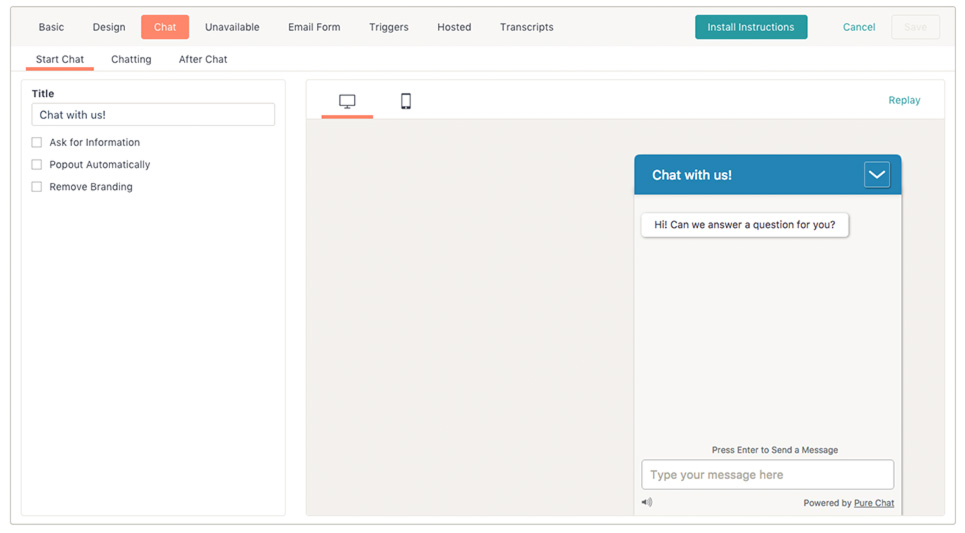
After you’ve opened the chat box manager and selected a chat box, you can start customizing the chat box’s title, style, and color in the top bar.
Choose the Display Settings
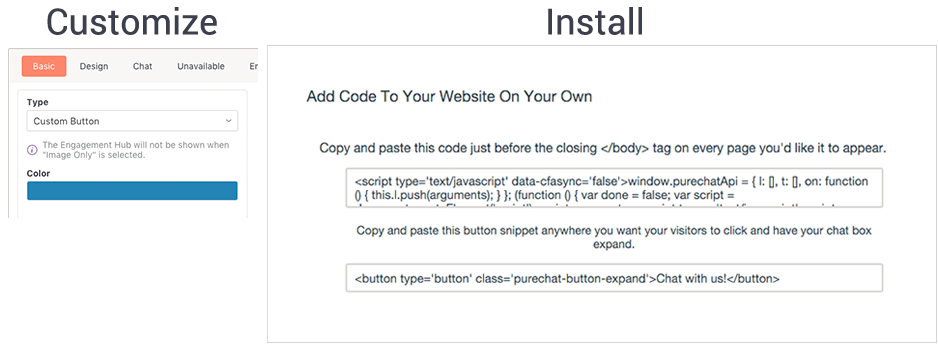
Use the Before Chat section to choose how you would like your chat box to appear before a visitor clicks on it. You can enhance the appearance with eye-catching graphics or select Custom Button from the Type dropdown if you want the chat box to be hidden until users press a button on your site.

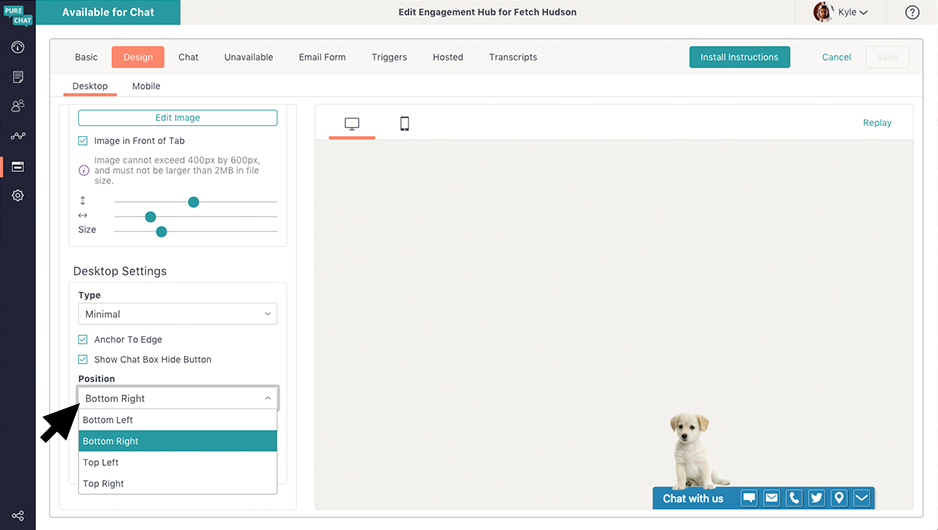
Set the Chat Box Position
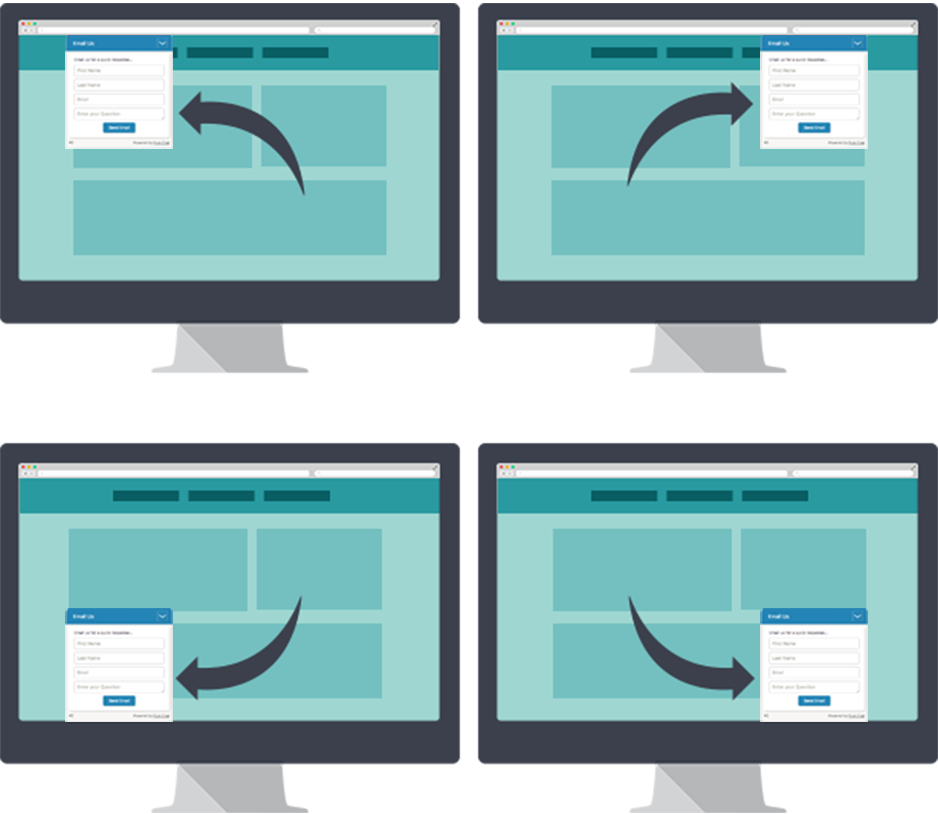
“To make sure the chat box doesn’t cover up key content on your site, you can anchor it to the corner that fits your design best. Don’t worry if it’s a little out of the way – you can also add subtle animations, so customers will still be encouraged to start chatting. Use the Position and Animation dropdowns in the Before Chat tab to set these features to your preference!
Add a Custom Link
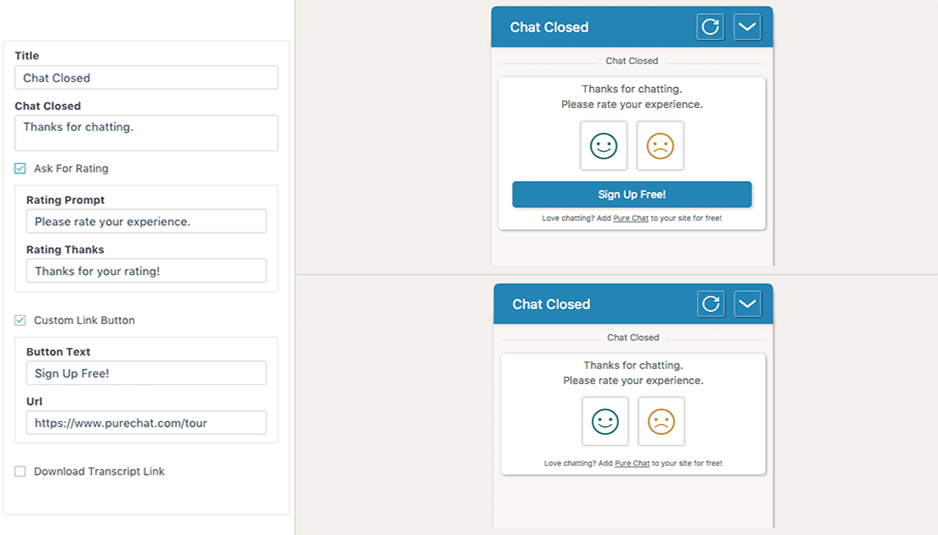
Check Custom Link Button in the After Chat tab to direct leads who have just chatted with you to specific page on your website or call-to-action. With the button you could invite website visitors to signup, schedule a demo, download an ebook and more.
Add a Custom Chat Button
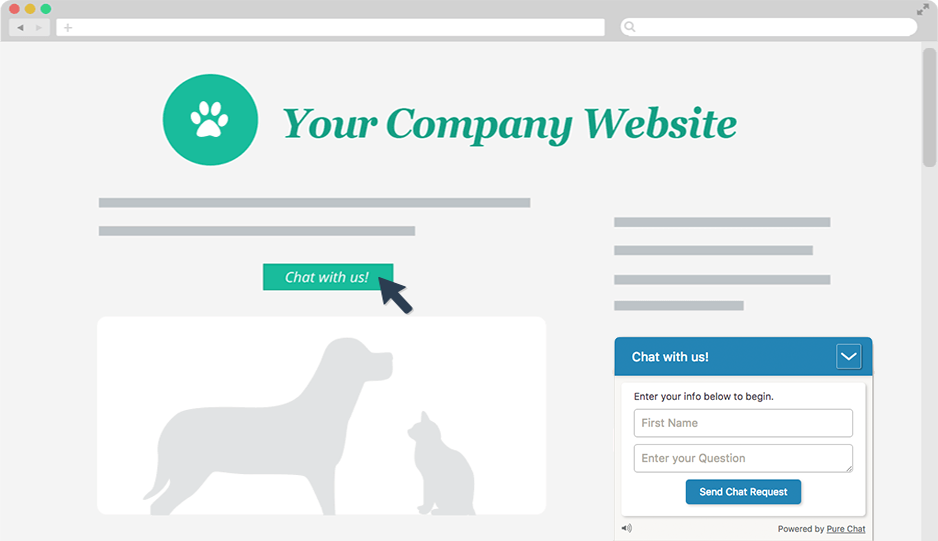
When you set Custom Button as the box type, your chat box will be hidden from website visitors until they click a “Chat with Us” button. To set this up, just paste the unstyled HTML snippet we provide (shown below) into your webpage and use CSS to make it match your site! As an example, the first image shows a styled button that has been clicked to reveal the chat chat box.
Set your chat box to an email form when you’re offline
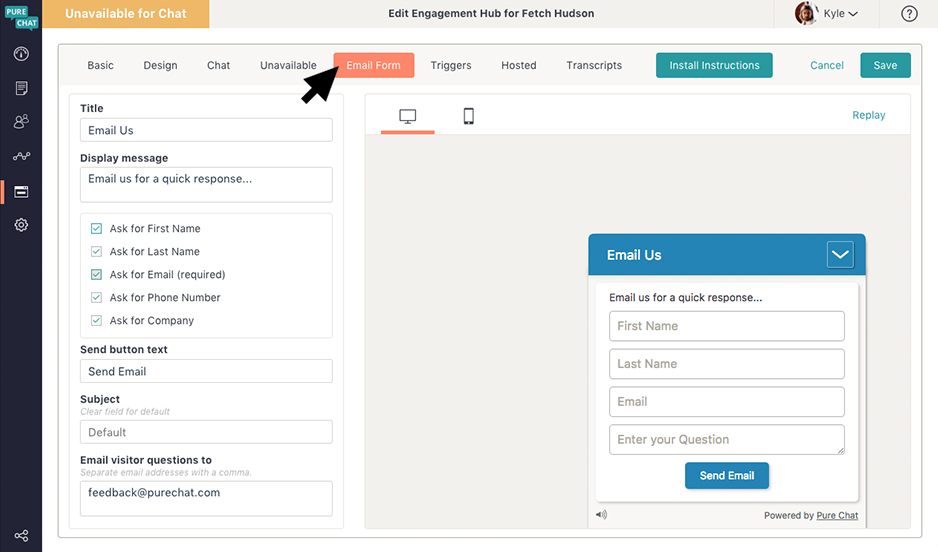
When editing your chat box, you can click on the tab that says Email Form to edit what’s visible when every team member is unavailable.
Set Triggers
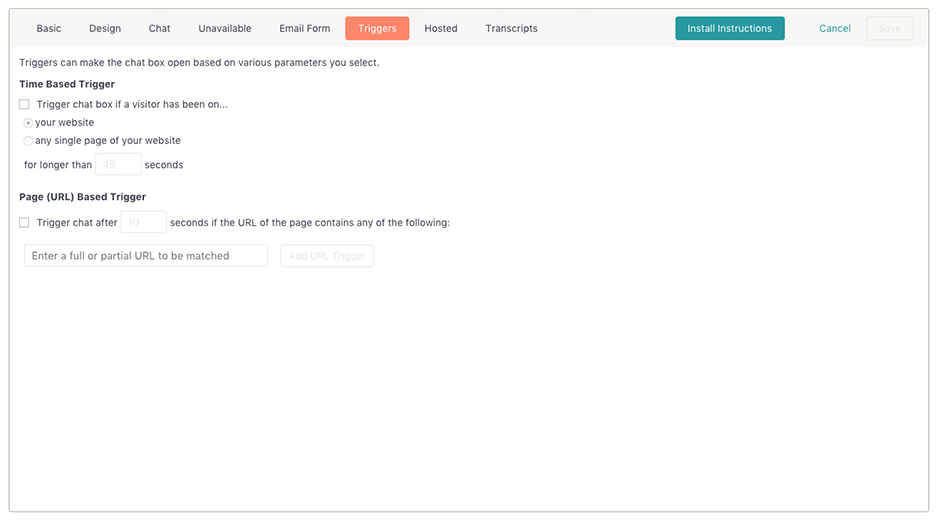
After clicking Websites in the left sidebar and selecting a chat box, you’ll see a tab labeled Triggers that will allow you to customize when the chat box pops up. Set the amount of seconds you’d like to have before the chat box pop ups for customers visiting your site. You can even set the chat box to trigger instantly on specific pages such as a pricing page or support.
Remove Pure Chat Branding
Once you’ve upgraded to the PRO Plan. Once you’ve upgraded to a PRO Plan, click Websites in the left primary navigation sidebar and toggle Remove Branding within your website options. Now your chat box for that website will not have “Powered by Pure Chat” at the bottom!
